Volunteer Robot
Sep 12
September 12th, 2018
Over the course of summer 2018, I forked and developed a volunteer scheduling database application. The README I created builds on the forked repository’s README and describes usage, features and installation of the application.
This post exists to specify which features I developed alone.
Table of Content
- UI Design
- Dashboard
- Event Page
- Backend Features
- Email Notifications
- Hide Empty Days Feature
- Filtering Users by Role for admins
- Change to Reminder timing through .ENV laravel doc
- Filter by week
UI Design
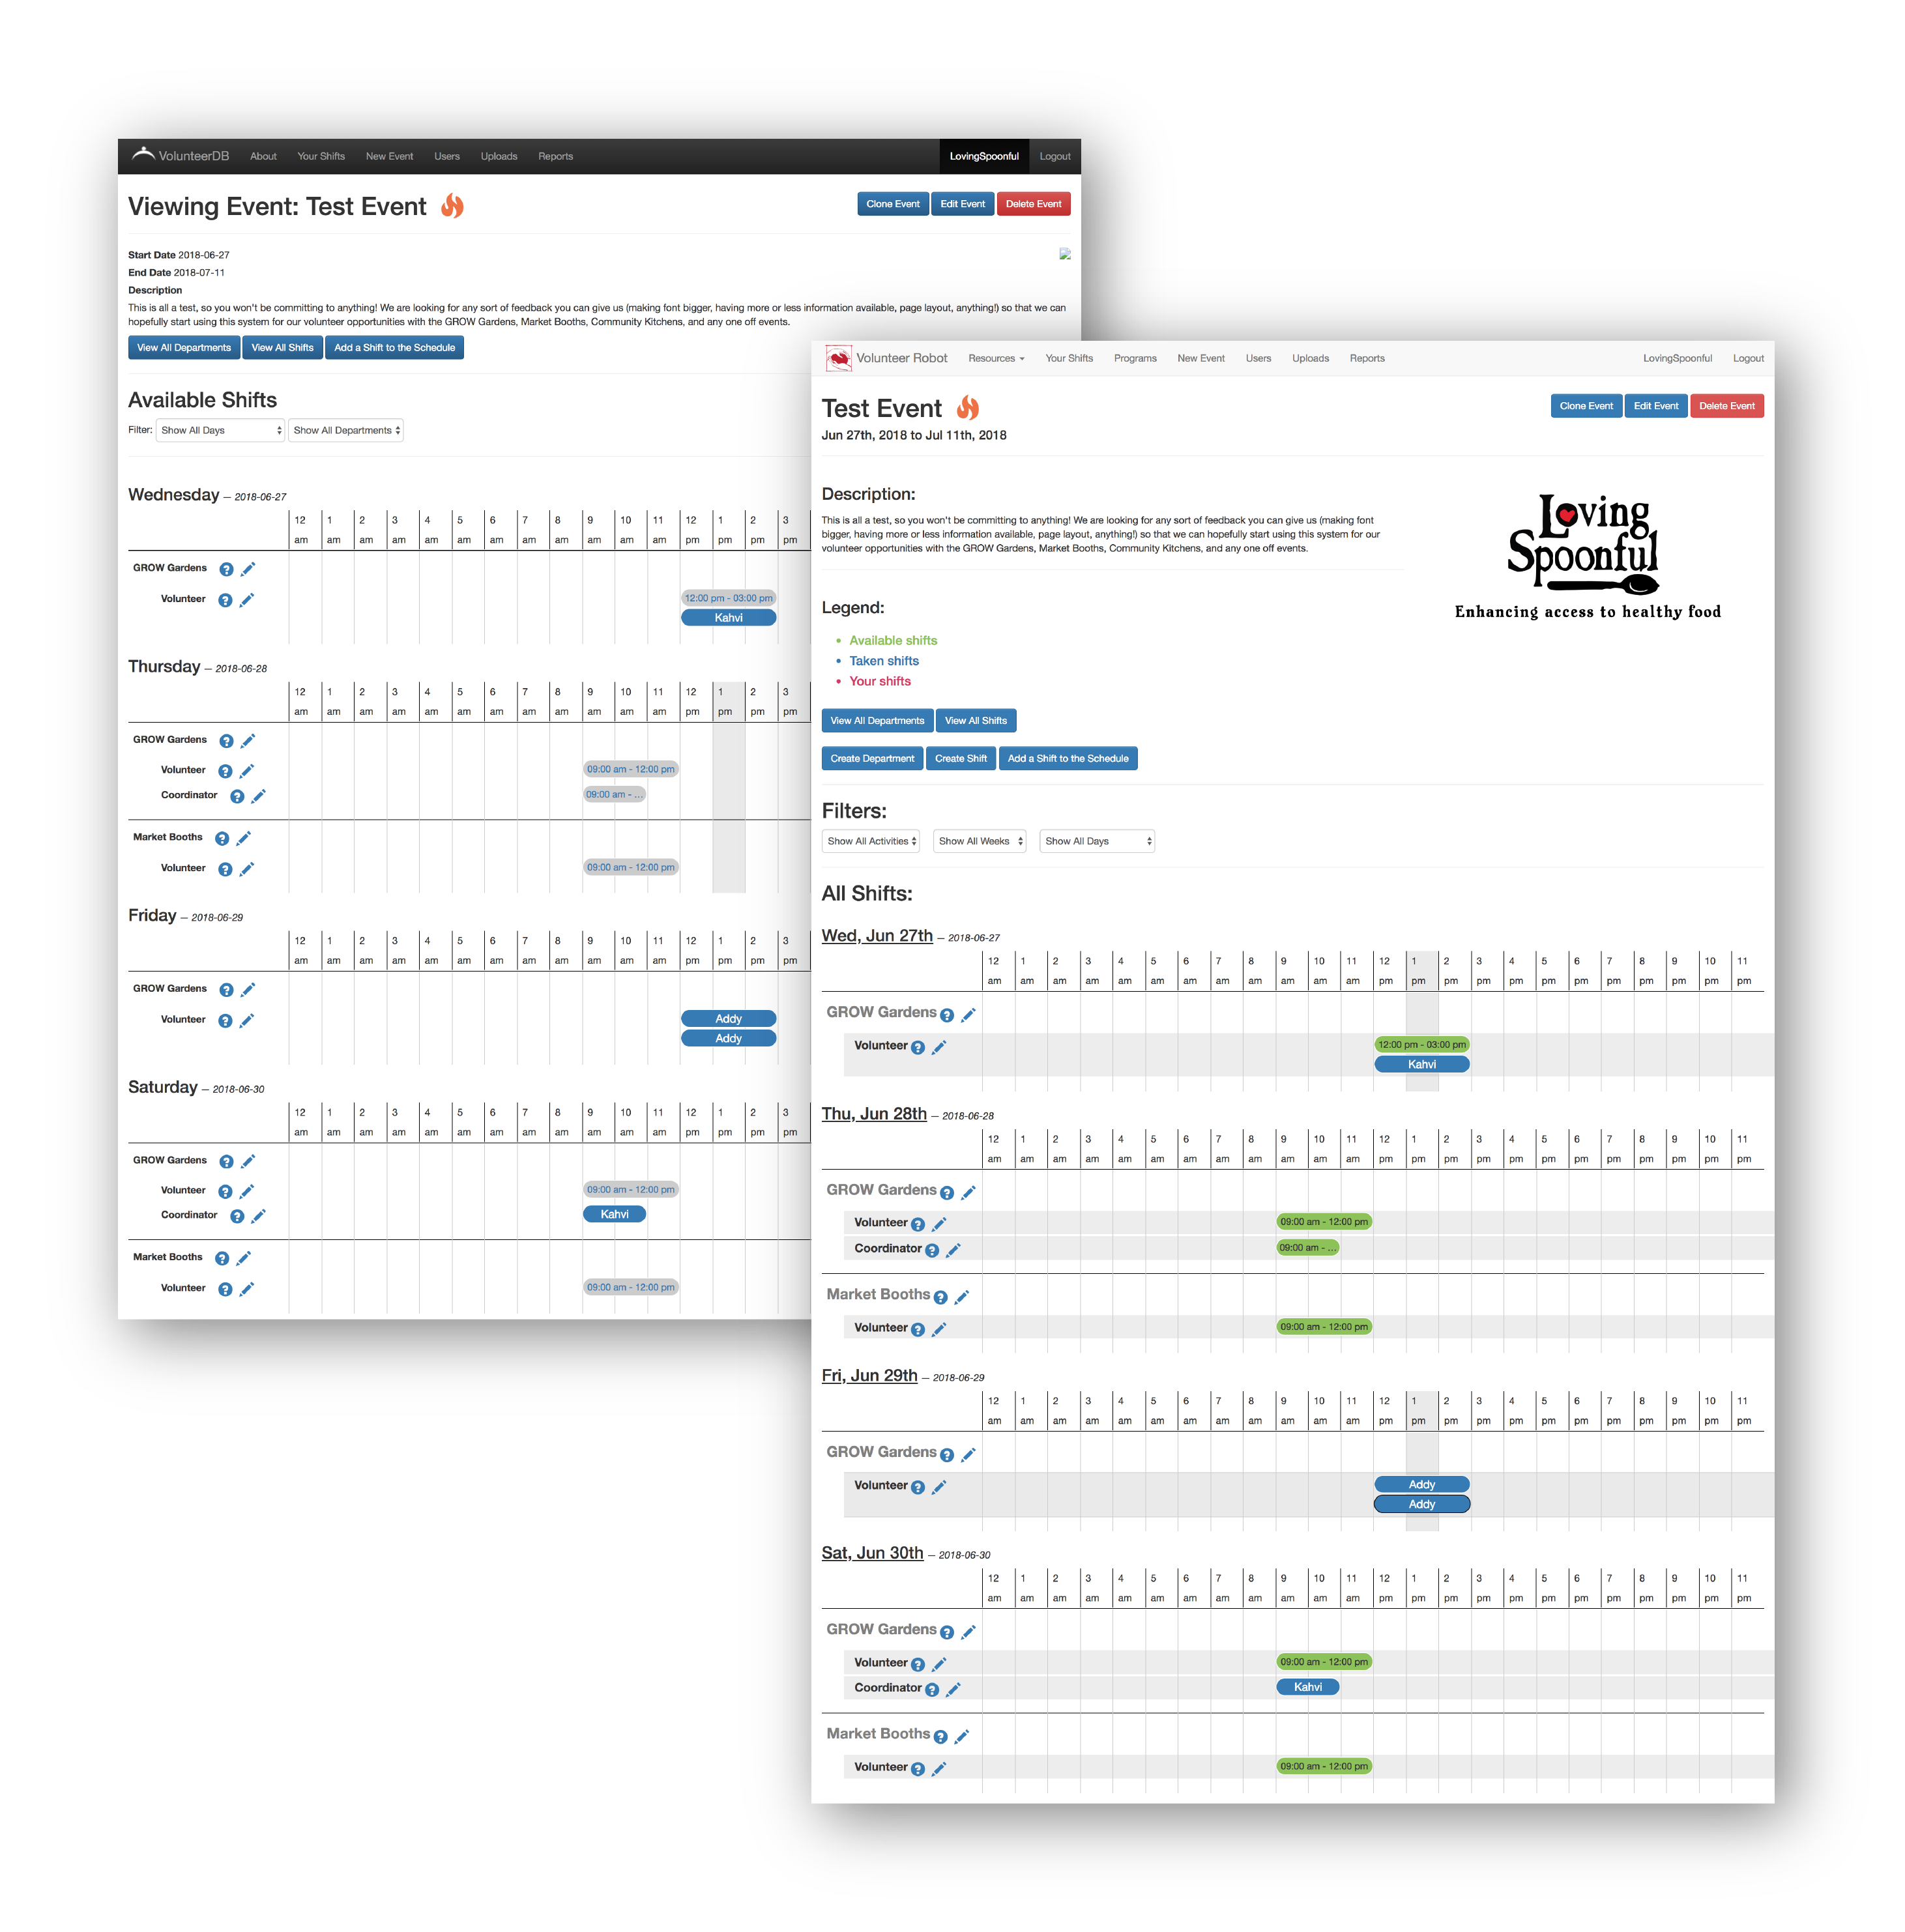
Event Page
I added a legend to the Event page. I changed the text formatting to make the page more legible. I changed the date format to make the page more legible.
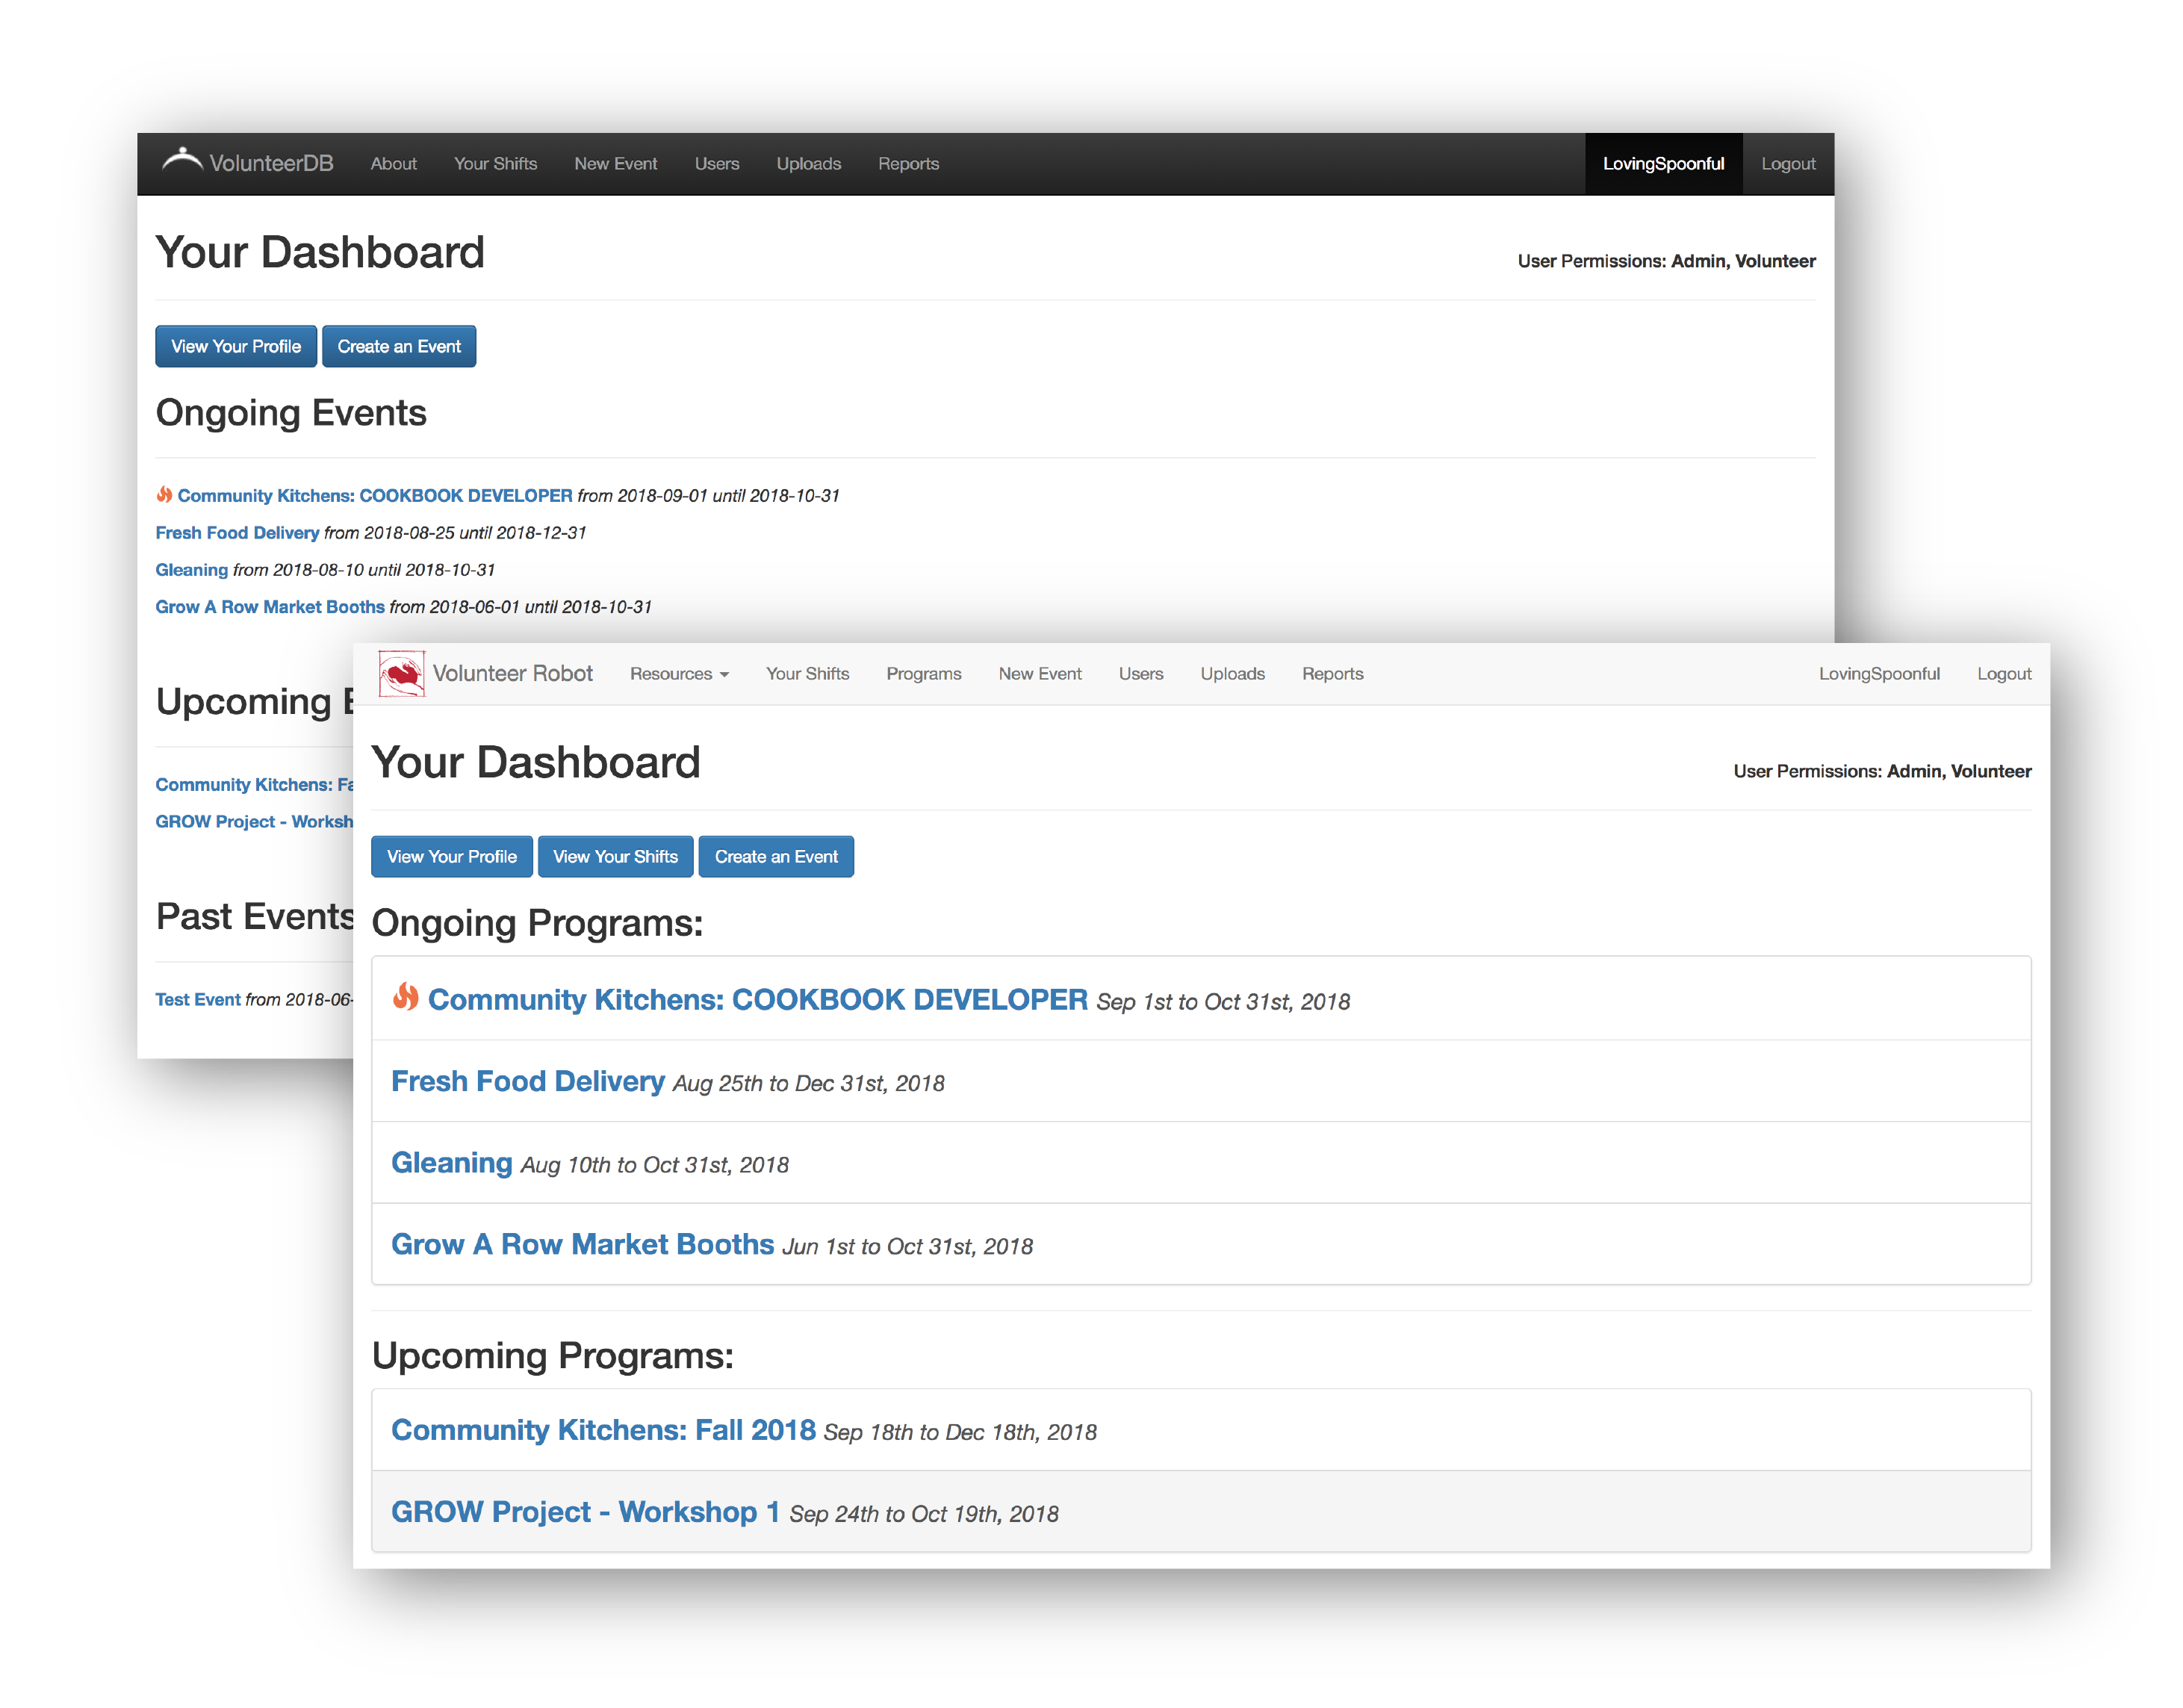
Dashboard
Using the bootstrap list items element, I made the dashboard more legible.
Backend Features
Email Notifications
On the advice of the original developer, my plan for developing the email notification feature was:
- Create a console command which loops through a table for any shifts starting within the next “hour”
- If a volunteer has signed up for that slot, send them a notification
- Add value to SQL table to prevent further notifications
- Add the command to the Laravel cron so it runs periodically (every 5 minutes? 15 minutes?)
This approach was somewhat inefficient given the Laravel cron would be running continuously when it wouldn’t need to. Scheduling a task immediately when a user signs up instead of iterating through the table continuously would be a better approach. Ultimately I chose to implement the feature as a simple solution using the existing schema as opposed to changing the schema and the controller logic.
To work through the logic of when to send reminders, I create variables for when the shift starts and when to remind the user for that specific shift. I do this by creating two Carbon dates and add a user-designated amount of hours to the second variable.
<?php

// Cycle through all the slots
foreach($shifts as $shift)
{
	$startDate = new Carbon(date('Y-m-d H:i:s', strtotime("$shift->start_date $shift->start_time")));

	$remindDate = new Carbon(date('Y-m-d H:i:s', strtotime("$shift->start_date $shift->start_time")));

	$now = Carbon::now();

	$remindDate->subHours(env('REMIND_HOURS'));
I find the shift starting within the given reminder period using the variables.
<?php
if($remindDate <= $now and $startDate > $now)
Then, I cycle through all users to find who is registered for the shift in question.
<?php
foreach ($users as $user)
	{
		// Find user that is registered for this shift
		if ($user->id == $shift->user_id) {
Then I notify the user of the shift. I used the MailGun api with Laravel to send the emails.
<?php
// Notify user of upcoming shift
if($shift->isNotified == 'No')
{
	$user->notify(new shiftStarting($shift, $user));
} else
In order to prevent the user from getting continuously notified, I created a column in the shifts table to track notification status.
<?php

// Update isNotified value in SQL database
DB::table('slots')
	->where('id', $shift->id)
	->update(['isNotified' => 'Yes']);
Hide Empty Days Feature
The Volunteer Robot often displayed days on the event page which didn’t contain any shifts. This meant a lot of unecessary scrolling for users.
My strategy was to cycle through each day that would be displayed on the event page and check if the day had a shift. Fortunately, this check was relatively simple after looking into different SQL queries.
<?php
// Pluck all of the shift IDs for this event and check the if any in the schedule start today
if(Schedule::whereIn('shift_id', $shifts)->where('dates', 'LIKE', "%".$date->format('Y-m-d')."%")->get()->isEmpty())
{
// Continue onto the next day
$date->addDay();
continue;
Filtering Users by Role for admins
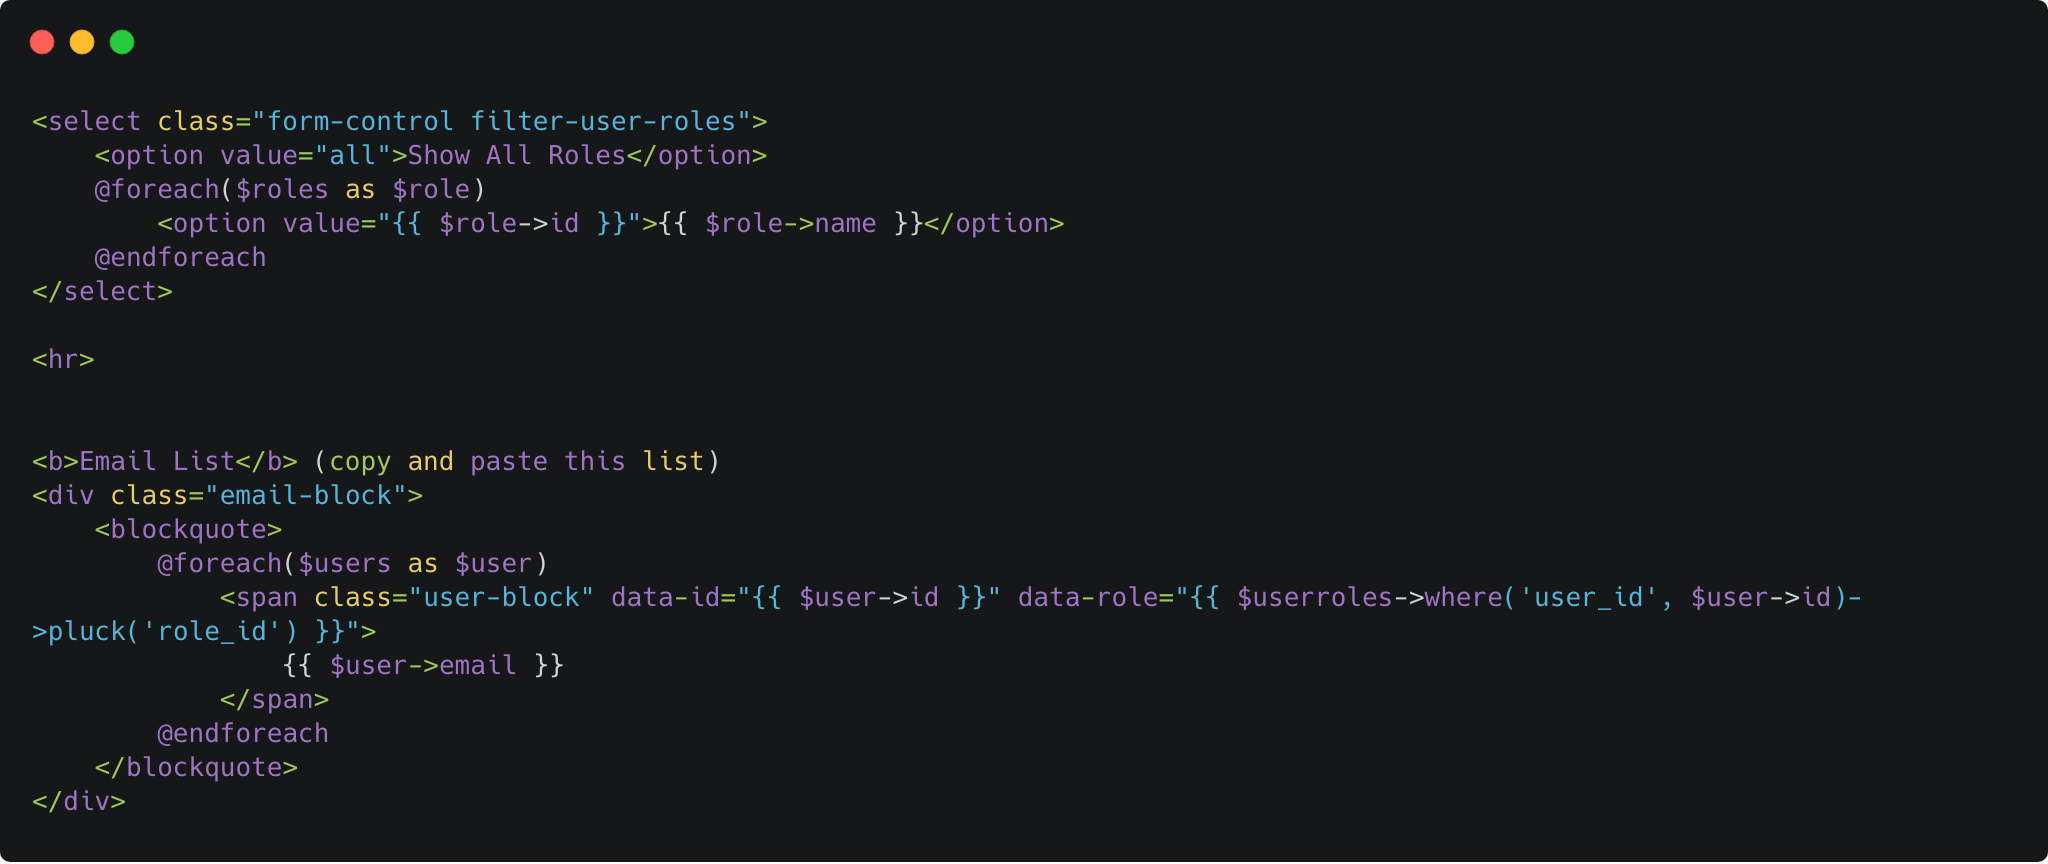
The admins of the Volunteer Robot regularly send out mass emails to volunteers according to their “Role”. They wanted to filter the users by their Role in order to access email addresses more efficiently.
I wanted to work in plain javascript for this feature to familiarize myself. This feature was challenging because the Users, Roles, and User Roles are all located in seperate SQL tables. Thankfully, this issue was easy to deal with once I understood how to make SQL queries within blade.php files. I plucked each user’s roles from the User Role table and put it in a class attribute.
On the other end, my main concern was how to filter users with multiple roles. Since my query returned a string of text, there was no way to distinguish one role from another. I had to split the result of that query in javascript to make it an array of each role. Then it was much easier to find out if the specified user had that role in their respective array.
 $('.filter-user-roles').on('change', function () {

        // define the role
        var role = $(".filter-user-roles").val();

        // define all the spans of the users
        var users = document.querySelectorAll('.email-block .user-block');

        // hide all the users
        users.forEach(function(element) {
            element.style.display = "none";
        });

        if (role == "all") {

            // show all users
            users.forEach(function(element) {
                element.style.display = "inline";
            });

        } else {

            // show user if they have that role
            users.forEach(function(user) {

                var userRoles = user.getAttribute('data-role').slice(1,-1).split(",");

                if (userRoles.includes(role)) {
                    user.style.display = "inline";
                }
            })

        }
    });
Filter by week
Fortunately, there existed an implementation of a feature similar to this one in the application. This made it much easier to work this one out.
// Hide all the days
$('.days .day').addClass('hidden');

// Convert date to Moment format
let m = moment();

m = moment(date.toString());

// Show this one

// Loop through seven days
for(var i = 0; i < 7; i++)
{
    $('.days .day[data-date="' + m.format('Y-MM-DD') + '"]').removeClass('hidden');
    $(window).trigger('resize');
    m.add(1, 'days');
}
The most challenging part of implementing this feature was installing the Moment package on the active server. Without this package, I wasn’t able to manipulate date strings easily. Since the server ran Ubuntu, the package wouldn’t install. After some Googling, one line of code in the header.blade.php solved all my problems.
<script src="https://cdn.jsdelivr.net/npm/[email protected]/moment.min.js"></script>